Custom Form Builder
Create embedded forms and popups, receive submissions, and configure email notifications from Magento Admin. This guide describes the extension; verify your target Magento/PHP environment before production deployment.
Installation and prerequisites
Install the required Magedia Core shared package together with Form Builder. Configure authorized Commerce Marketplace Composer access. Use a Core package compatible with your Magento and PHP environment.
Install through your authorized Composer repository with: composer require magedia/m2-form-builder. Enable Magedia_Core and Magedia_FormBuilder with bin/magento module:enable, then run bin/magento setup:upgrade, bin/magento setup:di:compile, and bin/magento setup:static-content:deploy for your store locales. Flush caches. Follow your normal production deployment procedure and configure Magento cron.
Enable the extension
Open Stores > Configuration > Magedia > Magedia Custom Form Builder. Enable the module for the intended configuration scope. Set upload limits and optional submission retention. Retention 0 keeps submissions until manually deleted; cleanup also deletes their attachments. Save and refresh the configuration cache.
Create and edit a form
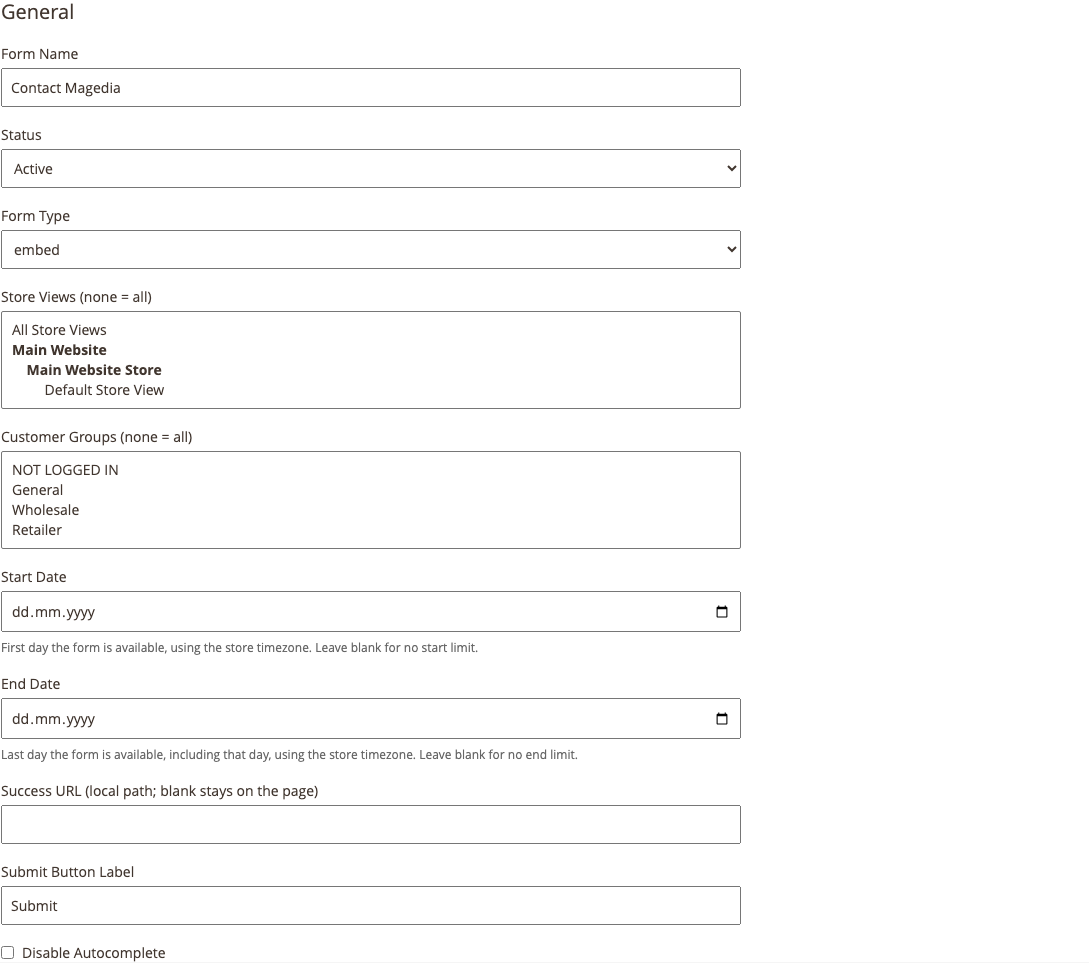
Open Magedia > Magedia Custom Form Builder > Forms. Create a form, enter its name, and select Active status. In General, choose Embed or Popup. Select eligible store views and customer groups; no selection means all. Set button text, success redirect, and autocomplete preference.
Start Date is the first available day. End Date is the last available day, inclusive. Both use the store timezone. Leave either blank for an open-ended schedule. Outside the schedule, the form is hidden and submissions are rejected.
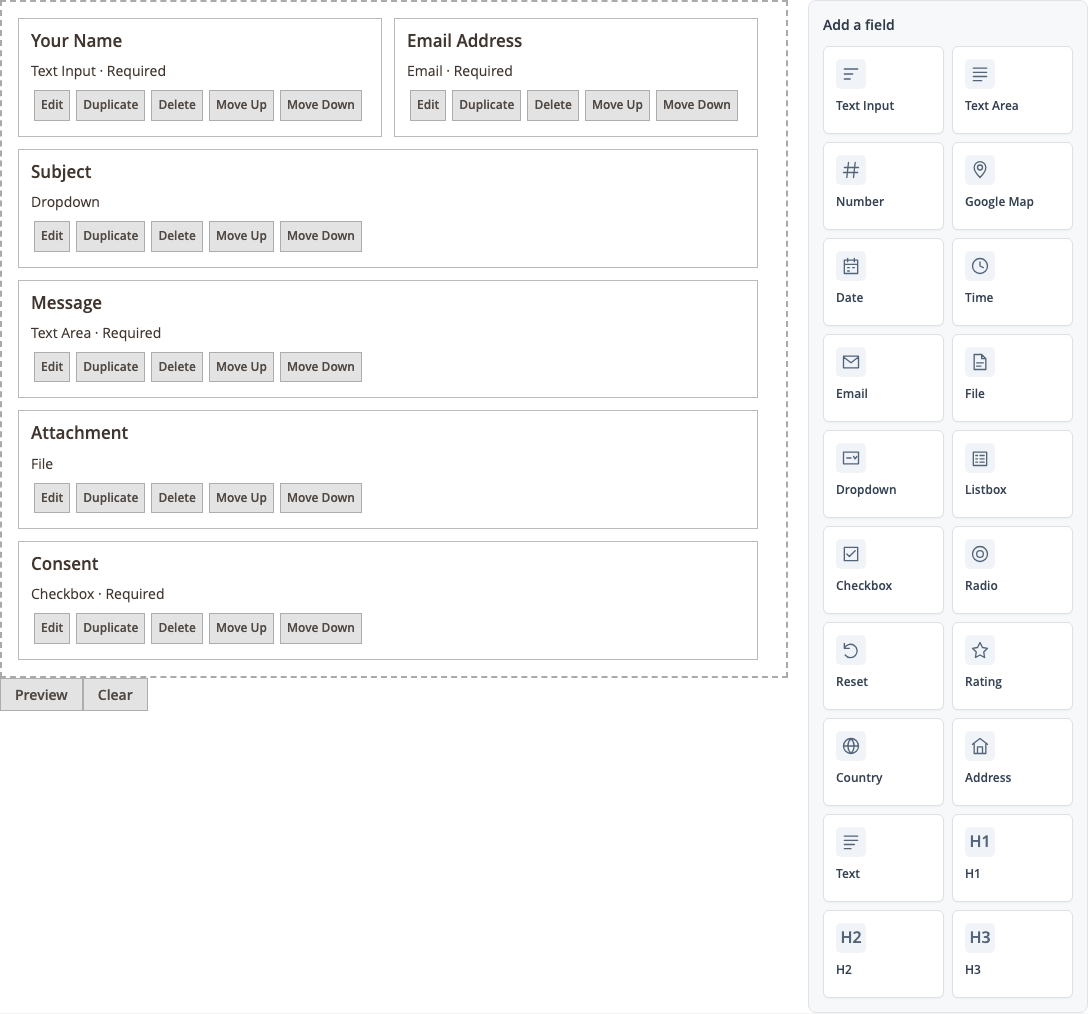
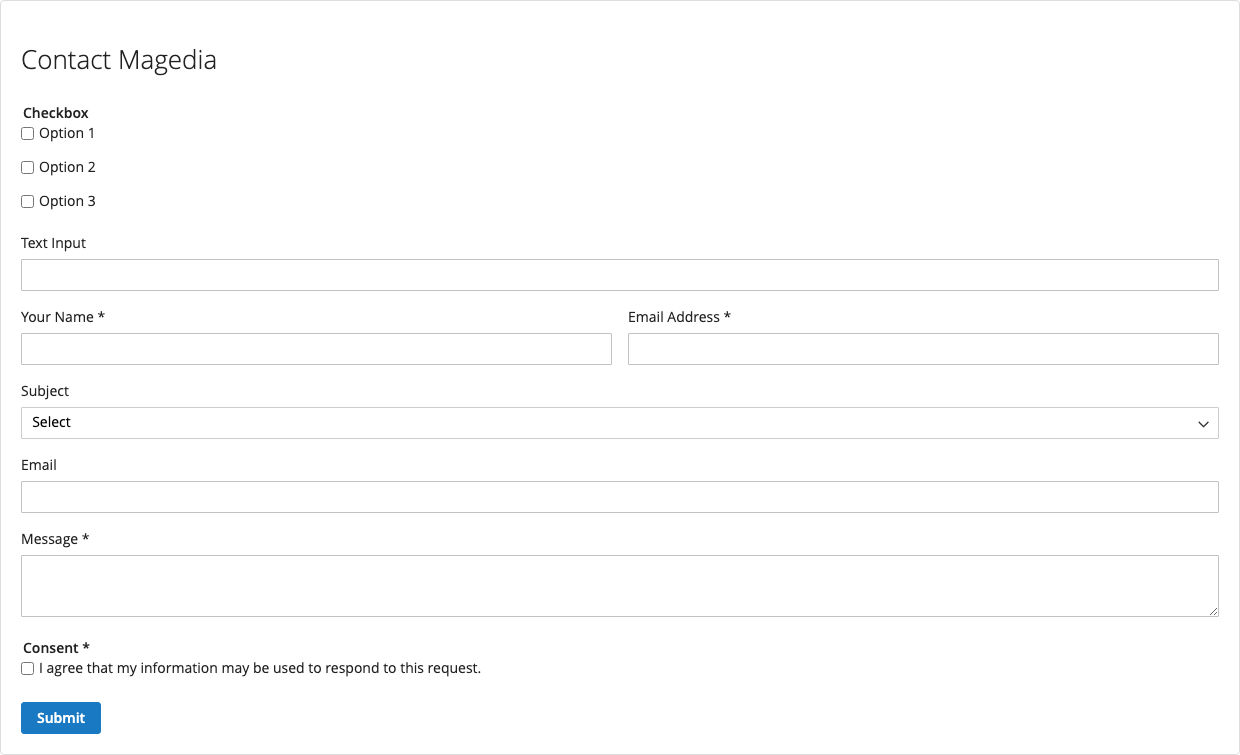
In Form Creator, click or drag a field from the palette. Edit its label, placeholder, requirement, layout width, and relevant validation settings. Use Duplicate, Delete, Move Up, or Move Down, or drag existing fields to reorder. Preview the form. Save and Close applies field changes locally; Save or Save and Continue persists the whole form.
Field types and options
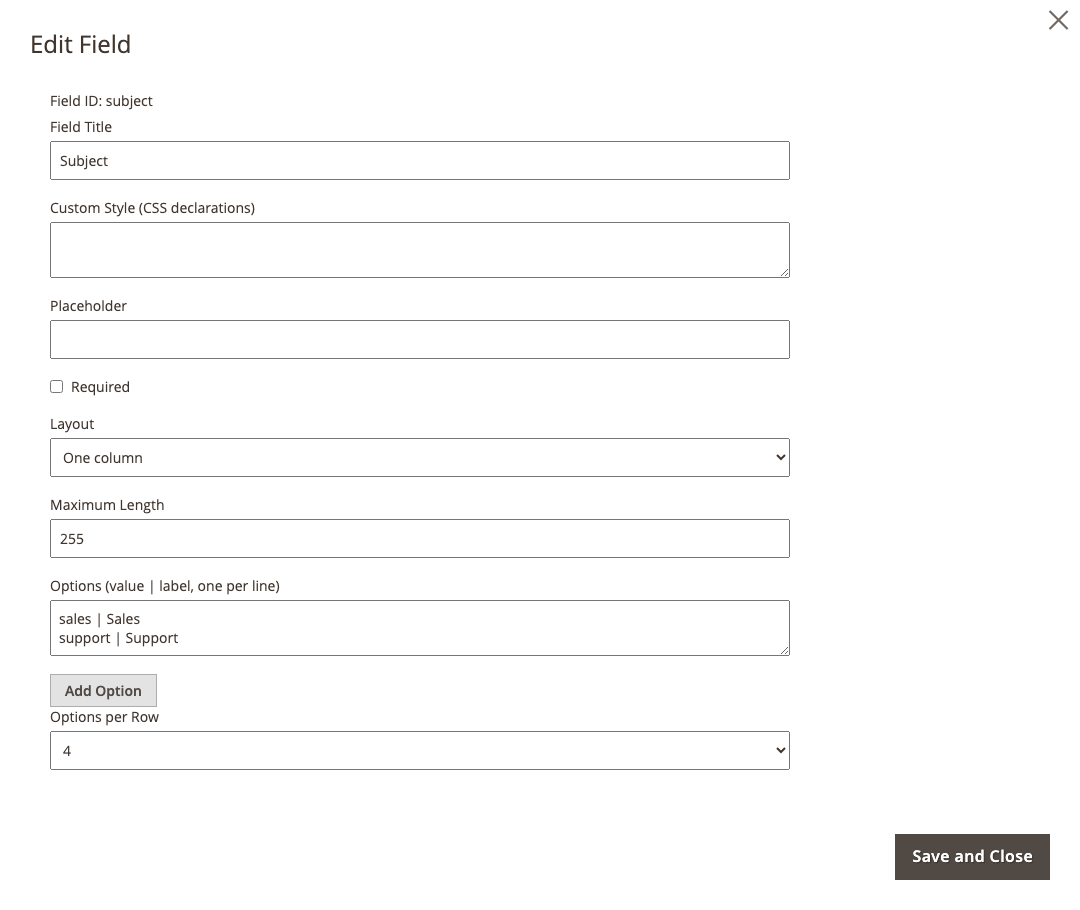
Choose text, text area, number, map, date, time, email, file, dropdown, listbox, checkbox, radio, reset, rating, country, address, text content, or H1-H3 headings. Static text/headings are escaped plain text. Choice options use one line per option in value | label format. Values must be unique. Layout widths support one, two, or three columns.
Number fields have minimum, maximum, and step settings. File fields have extension, size, and multiple-upload controls. Only supported detected file types are accepted. A map field can use the configured Google Maps API key or manual coordinates; Google Maps is an external service.
Display and popups
In Display, choose all pages or the supported specific page/category/product targets and one of nine positions. Embed placement follows the selected zone. Popup Delay is measured in seconds; 0 opens immediately. Popups appear once per form version per browser-tab session and include a close button. Saving a new version allows another appearance.
For a particular CMS page, insert a Custom Form Builder widget selecting the form, or use the CMS directive {{widget type="Magedia\FormBuilder\Block\Mount" form_id="1"}} with the actual form ID. A selected widget bypasses automatic page targeting but still respects status, store, customer group, dates, and configured Embed/Popup type.
Notifications
Notifications are disabled by default. In Notification, enable Notify Administrator and enter Admin Email, or enable Send Auto Response and select the Email Template and Recipient Email Field. The recipient must be an email field in the form. Save, then submit a new form response. Previously saved submissions do not create notification jobs retroactively.
Magento cron processes queued messages and retries failed deliveries. Configure Magento email transport for your environment. Delivery is at least once, so retries can produce duplicate messages after ambiguous transport failures.
Submissions and attachments
Open Magedia > Magedia Custom Form Builder > Submissions. Filter records, open their details, and download permitted private attachments. The record retains the original field labels, answers, and form version even after the form changes. Delete records carefully: removing submissions also removes their stored attachments. Deleting a form retains historical submission snapshots.
reCAPTCHA and data handling
Configure optional reCAPTCHA v2, invisible v2, or v3 in Stores > Configuration. Use keys registered for the store hostname and match the configured type. Google reCAPTCHA uses an external service. Protect collected customer data with appropriate administrator access and retention settings. Do not request payment credentials or unnecessary sensitive information through forms.
Troubleshooting
If the form is missing, check module enablement, form status, store/customer restrictions, dates, and targeting. If a popup appeared earlier, test in a fresh private window. If emails are missing, enable notifications before submitting, check the recipient field and transport, and verify cron.
If Magento reports an invalid Magedia_Core::extensions parent, install and enable Core and run setup:upgrade, then clean configuration/layout caches. After JavaScript or style updates, deploy static assets for your locale and hard-refresh the browser. Report reproducible issues to [email protected] with the module version, Magento/PHP versions, steps, and sanitized error details.