Abandoned Cart
Module description
Magedia Abandoned Cart for Magento 2 is a tool that - notifies customers when they left cart and didn’t complete the purchase - allows store admins apply cart rules, view all customers and their purchase data, send emails, and access statistics of email effectiveness.
Account & Pricing
A separate account creation won’t be needed for installation of the extension. There are some additional charges to use Magedia services: - installation fee ($35); - extension support/12 months ($300). For any inquiries please contact us.
Features
- Create and manage cart rules
- Set the time to consider the carts to be abandoned
- See all customers who made purchases and their data
- Create and send emails using different templates and conditions
- Track email status and resend emails if necessary
- View statistics: the percentage and sum of abandoned carts and returns
- Customize email templates, add branding elements
- Send low-stock, out-of-stock, back-in-stock notifications
- Send coupons
System requirements
Your store should be running on Magento Community Edition version 2.3.x or 2.4.x.
Installation
Please, proceed to the Installation Guide.
General Settings
Cart Rules creation and management
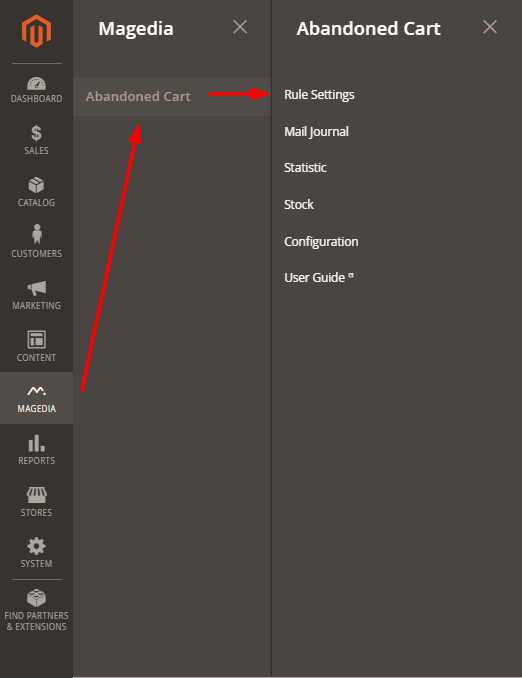
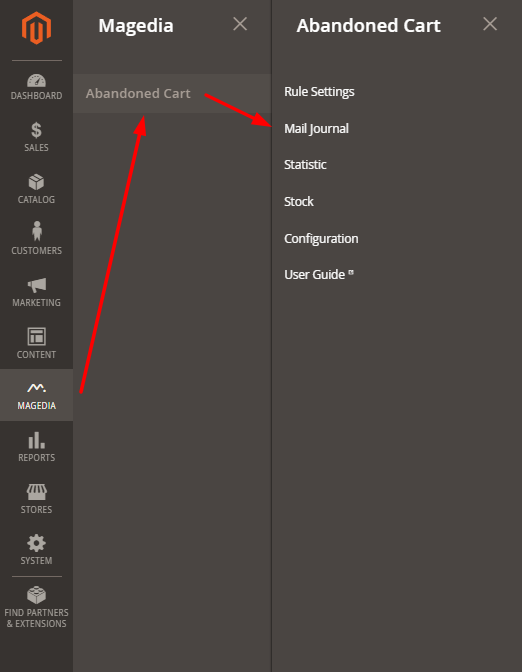
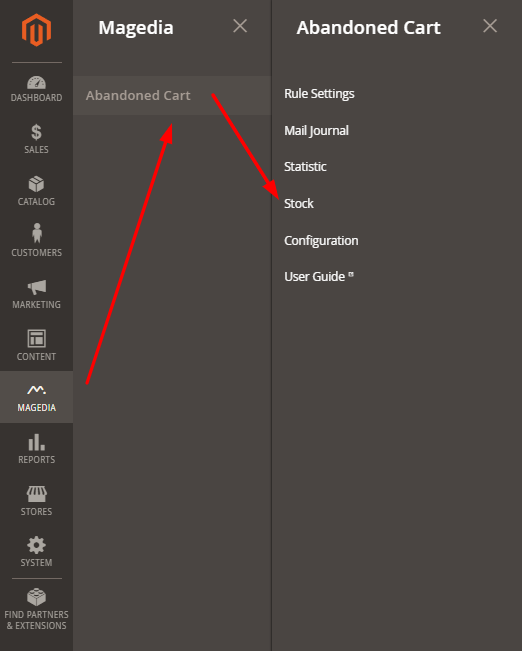
1) To manage all Cart rules go to Magedia -> Abandoned Cart -> Rule Settings.
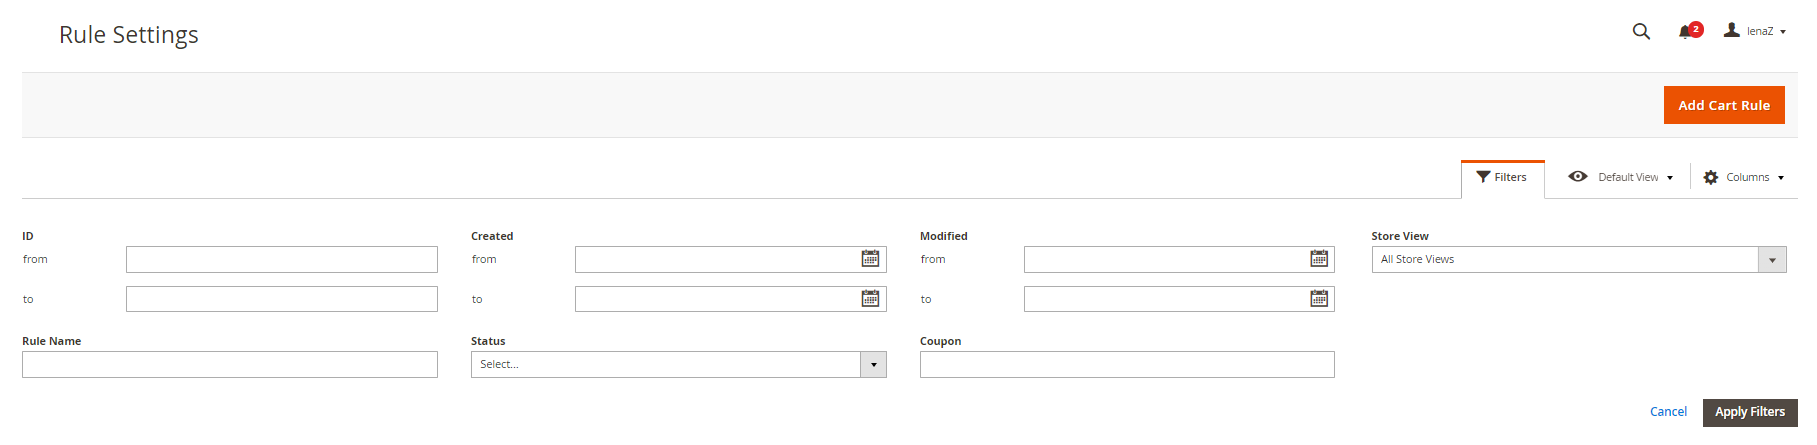
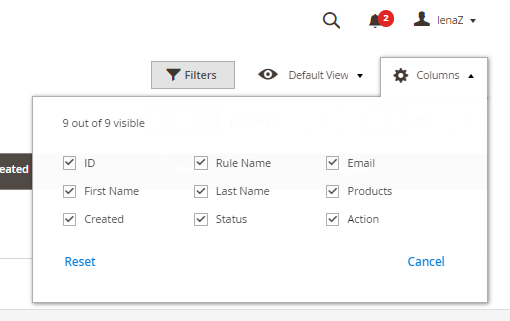
You will see the table with the following columns: - ID (The identifier of the rule in the system) - Rule Name (The name of the rule) - Status (The status of the rule) - Created (The date and time of creation the rule ) - Modified (Date and time of modifying the rule) - Coupon (The coupon code ) - Action (Edit or Delete the rule)

If you want to change the visibility of the columns, click “Columns” and tick the columns which you want to see in the table.

Columns are resizable. You also can change order columns - just drag and drop columns to place them in the desired order.
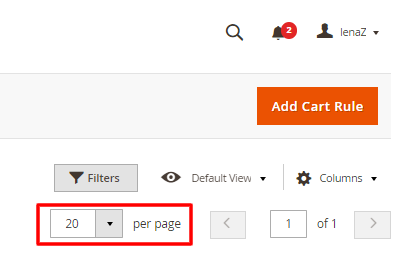
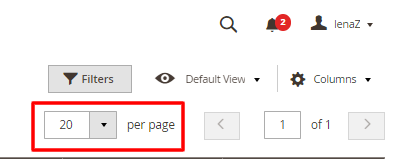
2) Pagination by default shows 20 records, you can also specify 30, 50, 100, 200 or custom number of records per page. To go to a definite page of the table, enter its number in the field or navigate via arrows.
3) To filter Cart rules click “Filter”, specify target values, and click “Apply filters”. To reset filters, click “Filter”, and click “Cancel” in the opened menu. You can filter the records by: - ID - Rule Name - Date of creation - Status - Date of modification - Coupon - Store View
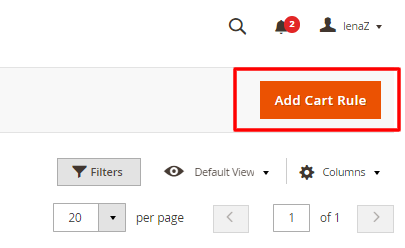
4) To create a new cart rule click “Add cart rule button”.
Cart rule information - General
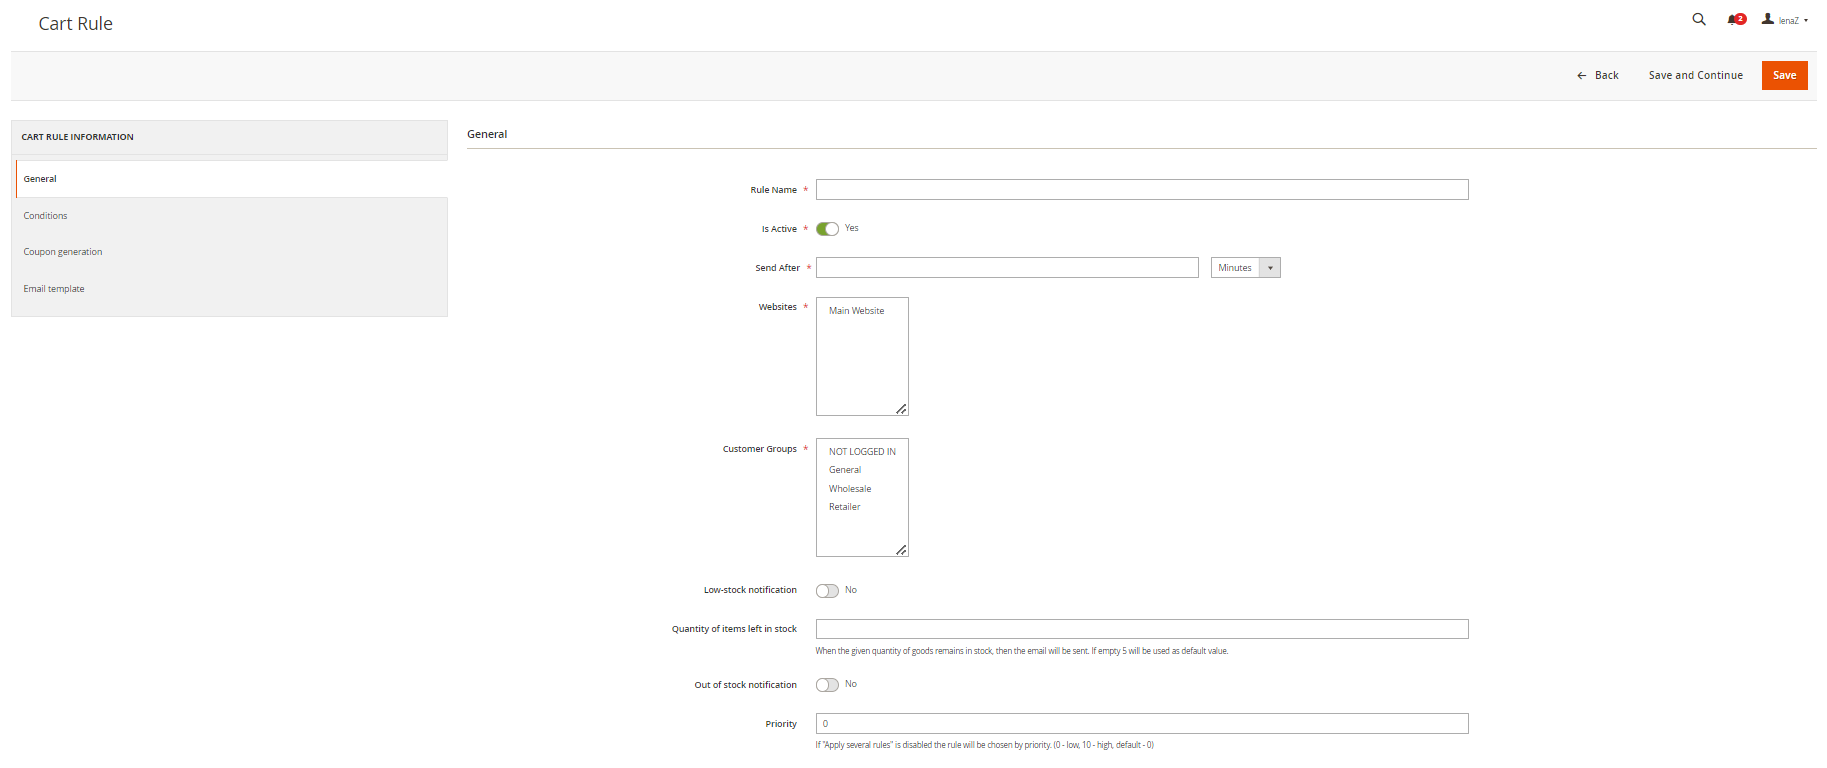
- Rule Name: specify the name/title of your rule
- Is Active: if you want to activate your rule right after the creation, specify “Active”. If you don’t want to activate your rule immediately, but just create it for the future, specify “Inactive”. You will be able to activate it later in the Rule Settings Menu (Magedia -> Abandoned Cart -> Rule Settings) by clicking “Actions” -> “Enable”.
- Send After: specify number of hours, days or weeks after notification on abandoned cart should be sent to the customer
- Websites: select stores for which this rule should work
- Customer Groups: select customer groups for which this rule should work
- Low-stock notification: apply if you want to include low-stock note into the notification on abandoned cart
- Quantity of items left in stock: apply if you want to include note on number of items available in stock into the notification on abandoned cart
- Out of stock notification: apply if you want to inform that the item is out of stock together with the notification on abandoned cart
- Priority: select priority from 0 (the lowest) to 10 (the highest). Thus if "Apply several rules" is disabled the rule will be chosen by priority. (0 - low, 10 - high, default - 0)
Cart rule information - Conditions

- Subtotal: specify the subtotal of the customer order for which the rule should be applied
- Total qty: specify the total quantity of items of the customer order for which the rule should be applied
- Product SKU: specify the number of items in stock for which the rule should be applied
Cart rule information - Coupon generation
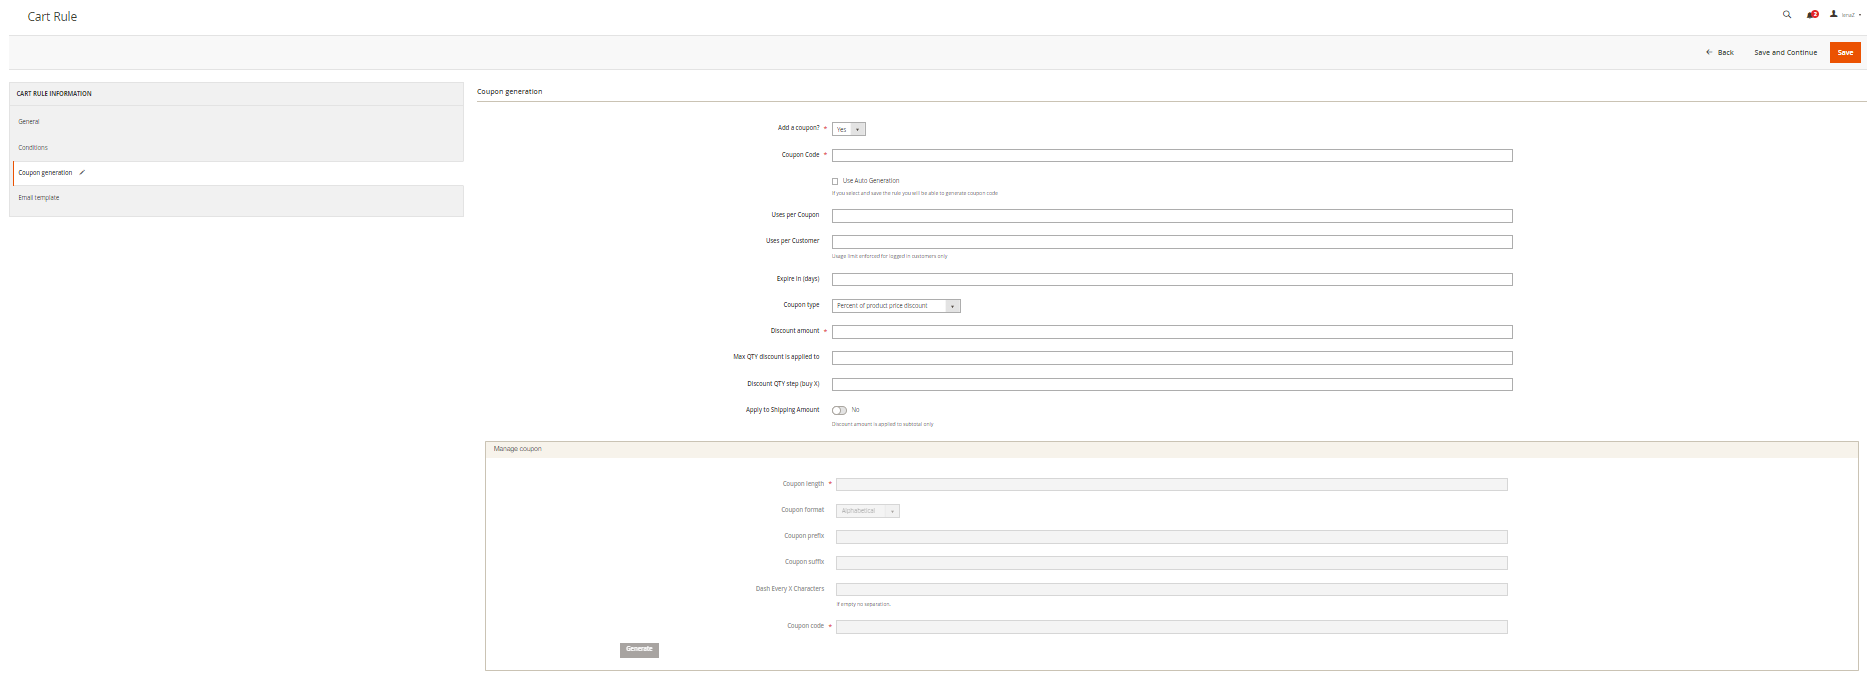
Add a coupon: specify if there a coupon should be applied for your rule or not.
If you specify that coupon should be applied, fill in the following fields: - Coupon code: generate your own or use auto generation - Uses per coupon: limit of coupon uses - Uses per customer: limit of coupon uses for logged in customer - Expire in (days): date of the coupon expiration - Coupon type: % of product price discount; fixed amount discount; fixed amount discount for a whole cart; buy X get Y free - Discount amount - Max QTY discount is applied to - Discount QTY step (buy X): if in the field “Coupon type” you’ve chosen “buy X get Y free”, specify X quantity, after reaching which the customer will get a discount - Apply to Shipping Amount: specify “yes” if you want the discount amount be applied to subtotal only
If you’ve chosen coupon auto generation, specify its artifacts: lengths, format (alphabetical, numeric, alphanumeric) suffix, prefix, dashes.
Cart rule information - Email template
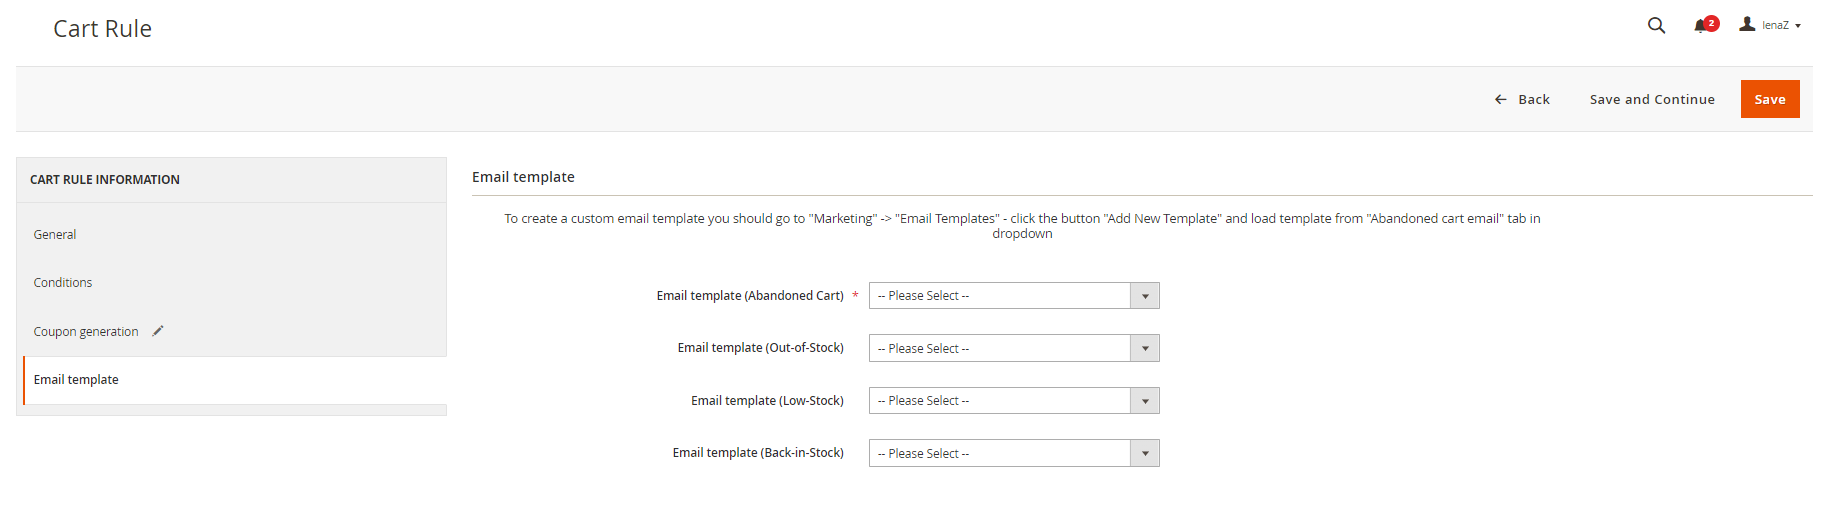
To choose a template form the list, open a drop-down list “Email template”
To create a custom email template you should go to "Marketing" -> "Email Templates" - click the button "Add New Template" and load template from "Abandoned cart email" tab in dropdown.
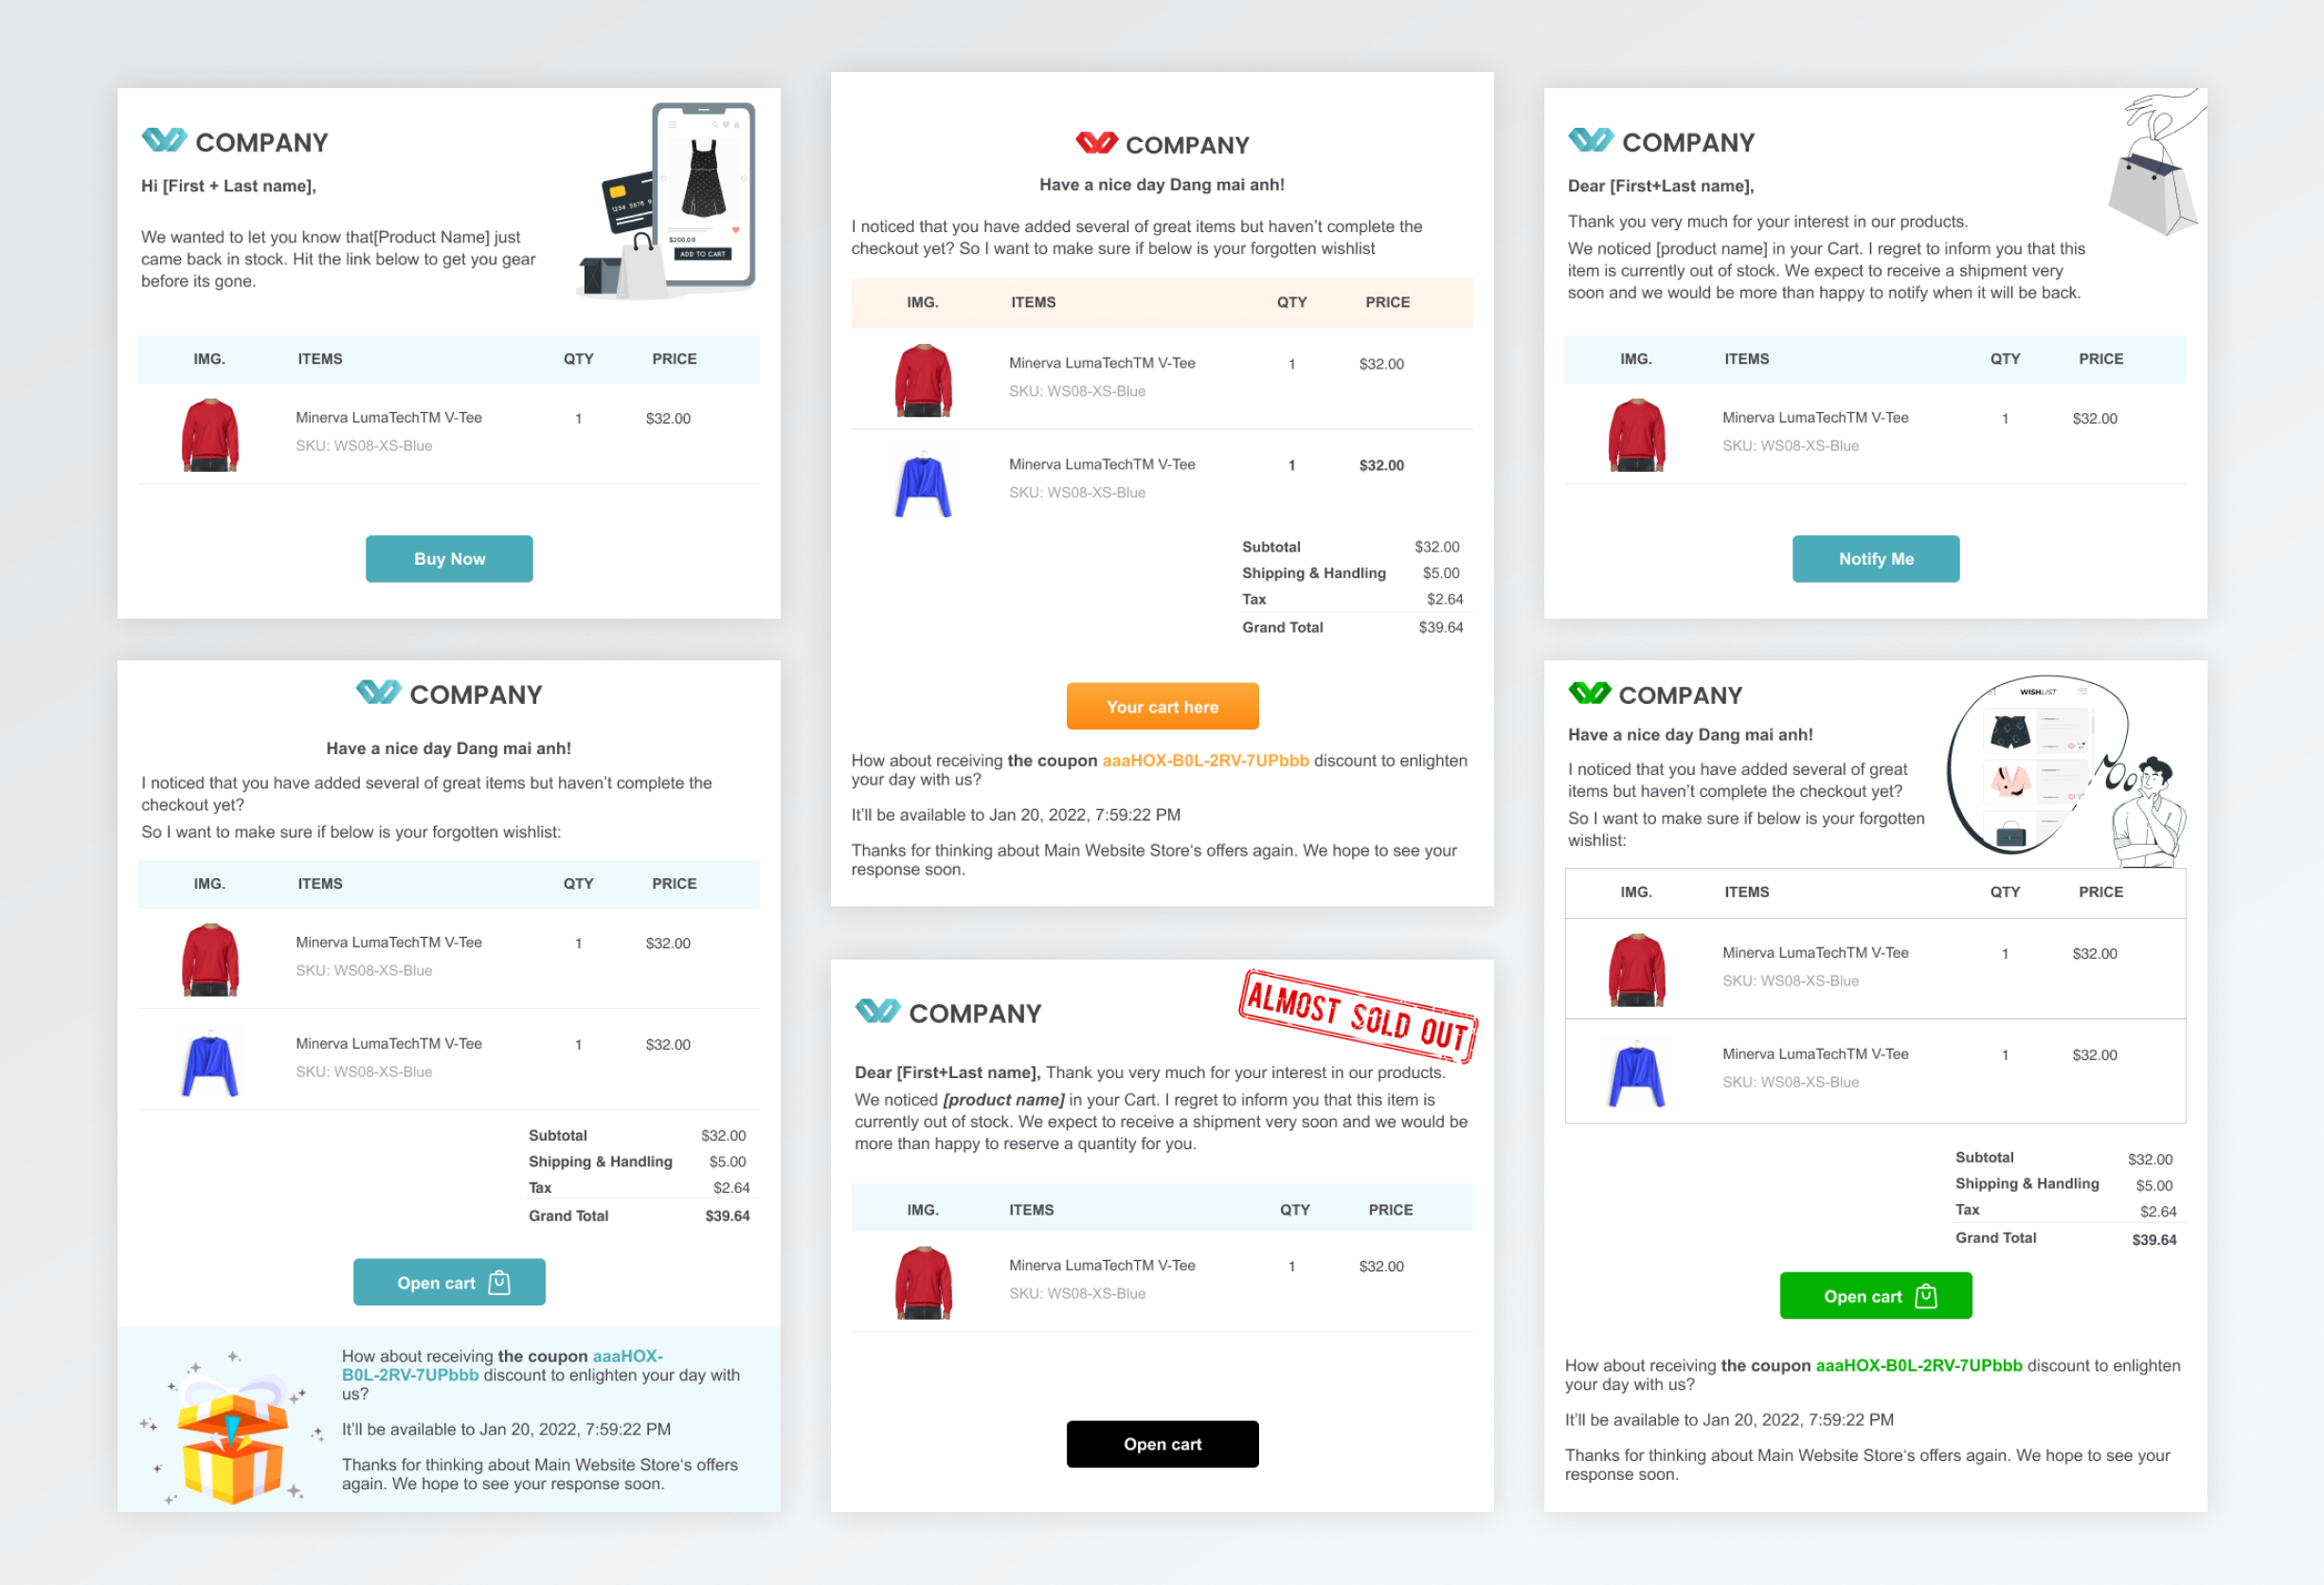
Examples of email templates you can choose and customize:
While creating the cart rule, If you want to save the intermediate result click “Save and continue” and keep on completing the fields.
After completing all necessary fields, click “Save” button. The new Cart Rule will be created. To abandon creating new rule click the “Back button”.
Mail Journal management
1) To access a database with customer emails go to Magedia -> Abandoned Cart -> Mail Journal.
You will see the table with the following columns: - ID (The identifier of the rule in the system) - Rule Name (The name of the rule ) - Email (The email of the customer) - First Name (The first name of the customer ) - Last Name (The last name of the customer) - Products (The products from abandoned cart) - Created (Date and time the email was sent. Should be blank in case of “Not sent” status) - Status (The status of the email - Sent (The email was sent successfully) /Not sent (The email wasn’t sent) - Action (Send Again (In case the status is “Sent” the administrator should have the ability to resend the same email) / Resend (In case the status is “Not Sent” the administrator should have the ability to resend the same email)

If you want to change the visibility of the columns, click “Columns” and tick the columns which you want to see in the table.
Columns are resizable. You also can change order columns - just drag and drop columns to place them in the desired order.
2) Pagination by default shows 20 records, you can also specify 30, 50, 100, 200 or custom number of records per page. To go to a definite page of the table, enter its number in the field or navigate via arrows.
3) To filter records click “Filter”, specify target values, and click “Apply filters”. To reset filters, click “Filter”, and click “Cancel” in the opened menu. You can filter the records by: - ID - Email - Date of creation - First and Last Name - Rule Name - Status

Statistics management
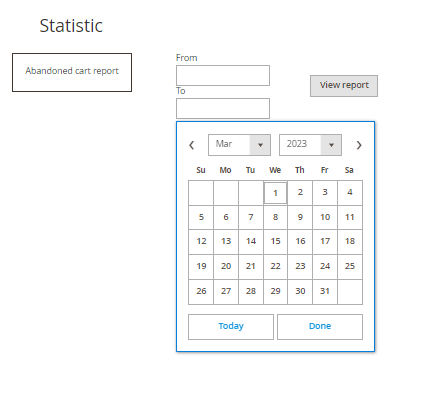
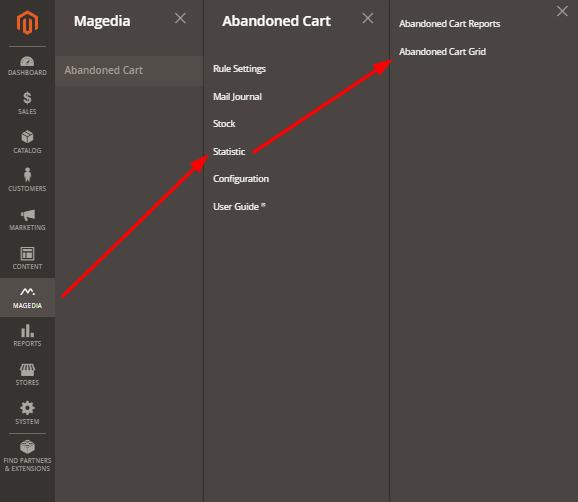
1) To access Reports go to Magedia -> Abandoned Cart -> Statistics -> Abandoned Cart Reports.

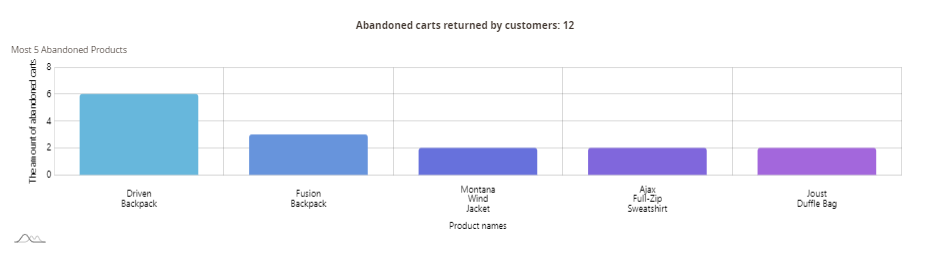
You will see a pie chart and two bar charts.
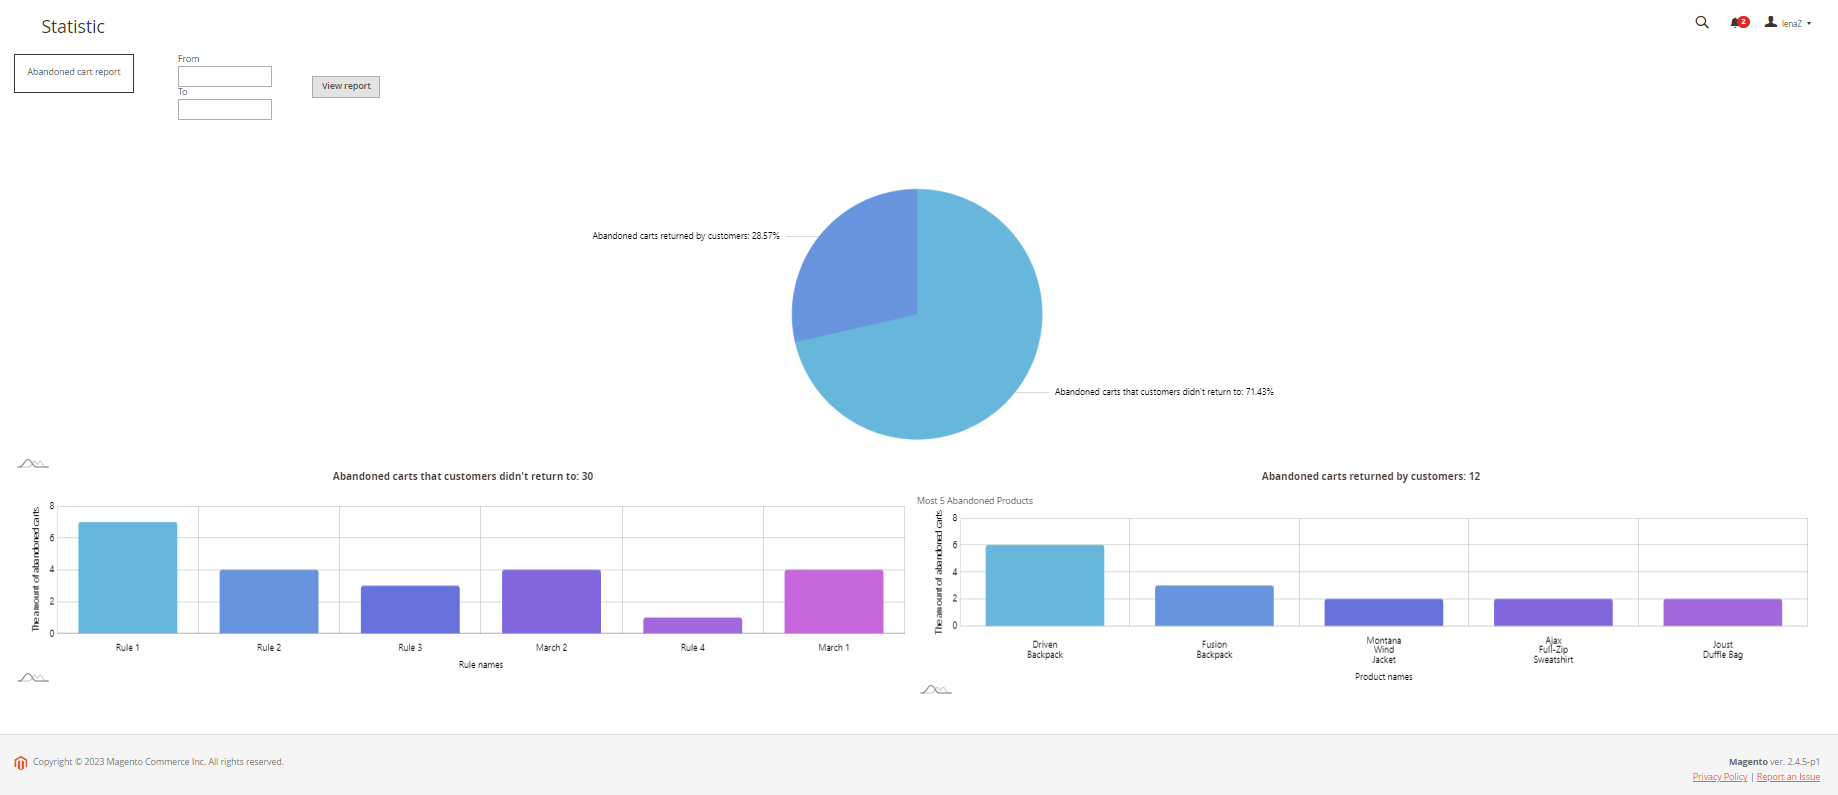
- To calculate statistics for a certain period, specify the necessary dates in the fields “From” and “To” and click “View report”. The statistics will be calculated and displayed in a pie chart, two bar charts, numbers, and the table.
- To see the amount of abandoned carts the customers didn’t return to per each cart rule proceed to the left bar chart.

- To see the amount of abandoned carts the customers returned to per each cart rule proceed to the right bar chart.
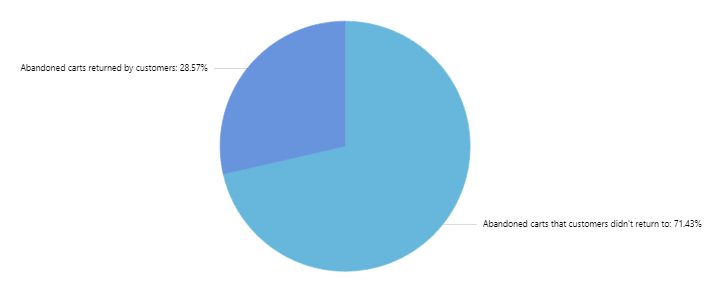
- To see the ratio between the amount of abandoned carts the customers didn’t return to and amount of abandoned carts the customers returned to, proceed to the pie chart.
2) To access Statistics go to Magedia -> Abandoned Cart -> Statistics -> Abandoned Cart Grid.
You will see the table with the following columns: - Email (The email of the customer) - Full Name (First Name and Last name of the customer) - The thrown cart stage (The stage when the customer left the store: Items in the cart (the items were added to the cart), Checkout page, Incomplete payment) - Product (All products from abandoned cart) - Gross Sum (The total amount of earnings) - Quantity of sent emails (The amount of emails the admin sent to the customer) - Was the coupon used? (Shows if a coupon was used: Yes, No, No coupon - in case no coupon was sent)
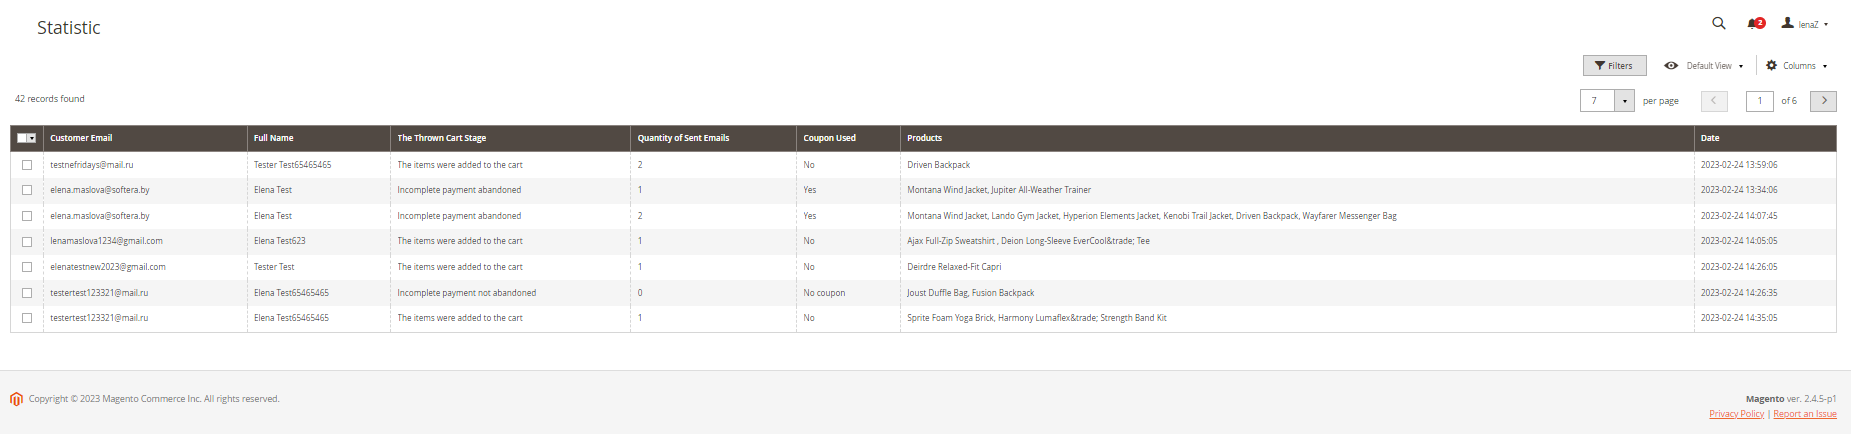
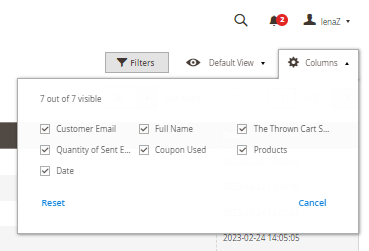
If you want to change the visibility of the columns, click “Columns” and tick the columns which you want to see in the table.
Columns are resizable. You also can change order columns - just drag and drop columns to place them in the desired order.
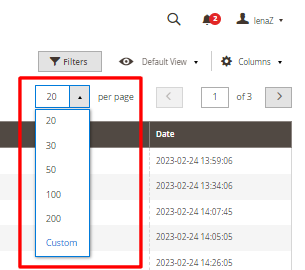
Pagination by default shows 20 records, you can also specify 30, 50, 100, 200 or custom number of records per page. To go to a definite page of the table, enter its number in the field or navigate via arrows.
To filter Statistics click “Filter”, specify target values, and click “Apply filters”. To reset filters, click “Filter”, and click “Cancel” in the opened menu. You can filter the records by: - Store View - Quantity of Sent Emails - Customer Email - Coupon Used - Full Name - The Thrown Cart Stage

Stock notifications management
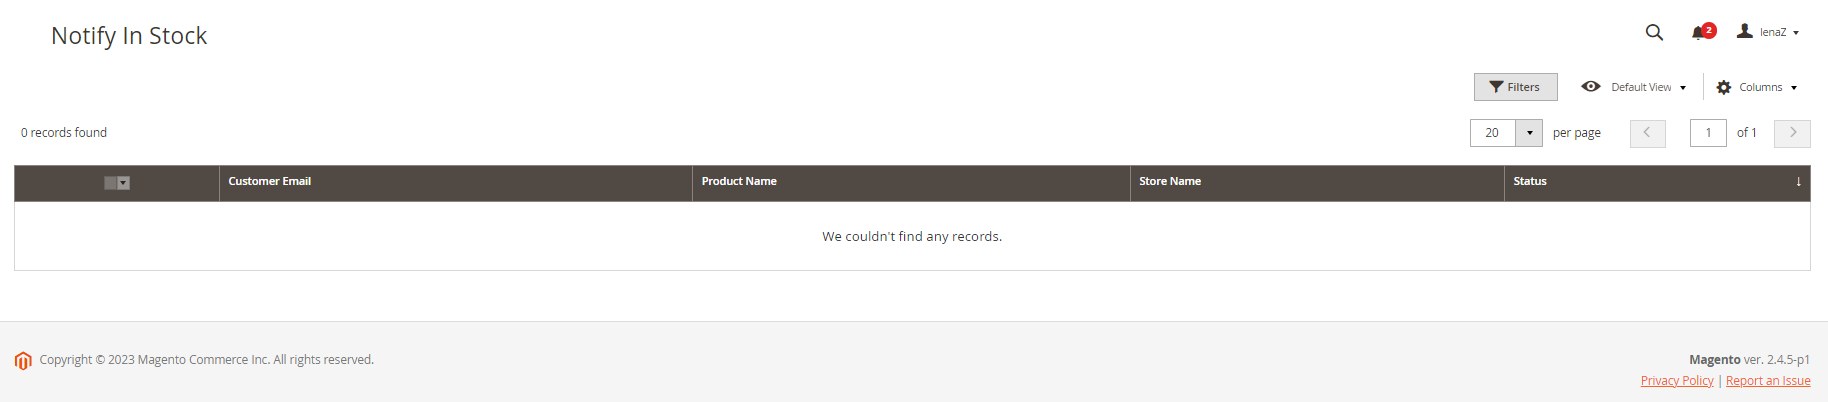
1) To see emails of customers that await notification that the items they had in the cart are in-stock again go to Magedia -> Abandoned Cart -> Stock.
You will see the table with the following columns: - Customer Email - Product Name: item that the customer awaits to be restocked - Store name: name of the store the customer awaits item restock - Status: active (if the in-stock notification will be sent after the restock), inactive (if the in-stock notification was already sent)
If you want to change the visibility of the columns, click “Columns” and tick the columns which you want to see in the table.
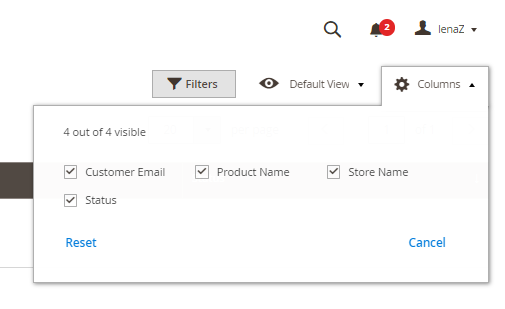
Columns are resizable. You also can change order columns - just drag and drop columns to place them in the desired order.
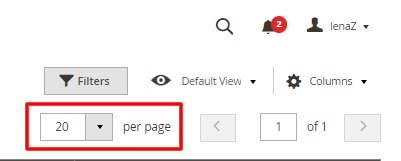
2) Pagination by default shows 20 records, you can also specify 30, 50, 100, 200 or custom number of records per page. To go to a definite page of the table, enter its number in the field or navigate via arrows.
3) To filter records click “Filter”, specify target values, and click “Apply filters”. To reset filters, click “Filter”, and click “Cancel” in the opened menu. You can filter the records by: - Customer Email - Product Name - Store name - Status
